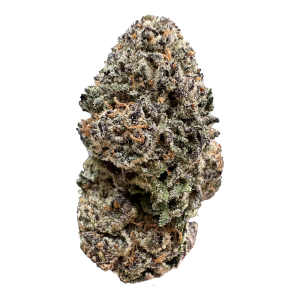
Shop at The Natural Remedy
for top shelf BC Buds
The gravity bong—often affectionately known as a “GB,” “geeb,” or “bucket”—is a staple of cannabis culture. Whether you own a sleek, store-bought glass piece like the Stündenglass or you are rocking a reliable DIY setup made from a soda bottle and a bucket, the principle is the same: massive hits, minimal effort.
But there is a dark side to the gravity bong. Because they use a large volume of water and often involve plastic (in DIY versions) or complex chambers (in glass versions), they can get filthy. A dirty gravity bong isn’t just gross to look at; it’s a breeding ground for mold, bacteria, and biofilm that can ruin the flavor of your flower and potentially harm your lungs.
If your water is looking murky, your bottle is yellowing, or your hits are tasting harsh, it’s time for a deep clean. This guide will walk you through exactly how to clean both commercial glass gravity bongs and homemade plastic setups, ensuring your next session is fresh, safe, and flavorful.
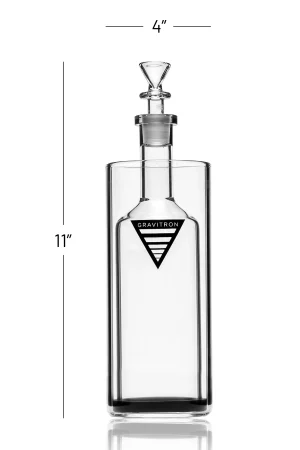
The anatomy of a gravity bong: Inner chamber meets outer base.
We have all seen “that” gravity bong at a party—the one with brown sludge coating the sides and water that looks like swamp runoff. Ignoring maintenance affects more than just aesthetics.
Standing water is a playground for bacteria. Within 24 hours, stagnant water can develop biofilm—a slimy layer of microorganisms. If you are using a plastic bottle, the risks increase. Plastic degrades over time, and cleaning it with harsh chemicals or heat can release toxins. Regular cleaning (and replacement) is vital for your health.
You spent good money on premium cannabis. Why filter those delicate terpenes through old resin? A dirty chamber coats fresh smoke in the taste of stale ash and tar, muting the distinct profile of your strain.
Resin buildup clogs the small airways in bowl pieces and caps, making the “draw” harder. A clean bong relies on smooth airflow to create that vacuum effect; if your airflow is restricted, your gravity bong won’t pull effectively.
If you invested in a high-end glass gravity bong, you need to treat it with respect. These pieces have moving parts, seals, and percolators that require specific care.
Isopropyl Alcohol (90% or higher): The gold standard for dissolving resin.
Coarse Salt (Epsom or Sea Salt): Acts as an abrasive scrubber.
Pipe Cleaners / Cotton Swabs: For the tight corners.
Ziploc Bags (Large): For soaking smaller parts.
Don’t try to clean it fully assembled. Take it apart completely.
Remove the bowl and the tray.
Unscrew the globes/chambers.
Carefully remove any rubber gaskets or silicone seals. Crucial: Soaking rubber in alcohol for too long can dry it out and cause cracks. Set these aside to be cleaned with warm soapy water instead.
For the glass chambers (globes):
Pour about 1/4 cup of coarse salt into the chamber.
Fill the chamber about halfway with Isopropyl alcohol.
Cover the openings with your hands (or rubber stoppers) and shake vigorously. The salt acts like a thousand tiny scrub brushes, scraping away the resin while the alcohol dissolves it.
Let it sit for 30 minutes if the buildup is stubborn, then shake again.
Place your downstems, connectors, and glass bowls into a Ziploc bag.
Add alcohol and a tablespoon of salt.
Seal the bag (remove as much air as possible).
Shake the bag gently to agitate the pieces.
Let them soak for 30–60 minutes.
Once the resin is dissolved, rinse every glass piece thoroughly with warm water. You want to ensure absolutely no alcohol residue remains.
Tip: If you see water spots drying on the clear glass, do a final rinse with distilled water for a crystal-clear finish.
Dry everything completely before putting it back together. Trapped moisture in threads can lead to mold. Re-lubricate any O-rings (if your manufacturer suggests it) and reassemble.
The rules change for homemade setups. Most DIY gravity bongs are made from 2-liter soda bottles and buckets. Plastic is porous and reactive, so you must be careful.
The Golden Rule of DIY: If the plastic bottle is yellowing, crinkling, or smelling permanently like a bong, throw it away and make a new one. Plastic bottles are not meant to be permanent pieces. However, if you need to clean one for a session tonight, here is how to do it safely.
Dish Soap: Safer for plastic than harsh solvents.
Warm Water: Not boiling (boiling water melts/warps plastic).
Rice: Acts as a gentler abrasive than coarse salt.
Isopropyl Alcohol (Use Sparingly): High-concentration alcohol can degrade certain plastics over time, making them brittle. Use it only for quick rinses, not long soaks.
Dispose of the old water in a toilet, not the sink (unless you want your kitchen to smell like a frat house for three days).
Fill the bottle about 1/3 full with warm water.
Add a generous squeeze of dish soap.
Add a handful of uncooked rice.
Cover the openings and shake aggressively. The rice will scour the sides of the bottle, removing the slime and light resin buildup.
The cap assembly is usually the dirtiest part.
Unscrew the cap/bowl.
If you are using a metal socket or glass bowl piece, remove it from the plastic cap.
Soak the metal/glass bowl in Isopropyl alcohol (just like the glass bong instructions above). This is safe for metal and glass.
Clean the plastic cap with warm soapy water and a Q-tip. Remove any resin that is clogging the airflow hole.
Rinse the bottle and bucket thoroughly with cold water until no soap bubbles remain. Smell the bottle—if it still smells strongly of solvent or soap, rinse again.
Ideally, the water in your bucket should be changed every single session. However, we know life happens. If your bucket has developed a ring of scum:
Bleach Method (for deep cleaning): Fill the bucket with water and add a capful of bleach. Let it sit for 20 minutes to kill mold spores. Rinse insanely well afterwards. You do not want to inhale bleach fumes.
Vinegar Method (Natural): White vinegar is excellent for removing hard water stains and killing bacteria without harsh chemicals. Soak the bucket in a 50/50 vinegar/water mix for an hour, then scrub and rinse.
Now that your piece is sparkling, here is how to keep it that way.
A few drops of lemon juice in your bong water can help prevent resin from sticking to the sides of the glass or plastic. The acidity makes it harder for the oil to bond, keeping your water cleaner for longer.
This is non-negotiable. Gravity bongs use a small volume of water compared to the amount of smoke they process. That water becomes toxic quickly. Dump it out after your session.
If you have a fancy glass gravity bong, invest in an ash catcher attachment. It traps the ash and resin before it enters the main chamber, meaning you only have to clean the small attachment regularly instead of the massive rig.
If you are still using a DIY foil or socket bowl, stop. Not only are they hard to clean, but they can be unsafe. Buy a cheap 14mm glass bowl and a rubber grommet. It fits into a bottle cap easily, is safer to smoke from, and can be soaked in alcohol for instant cleaning.
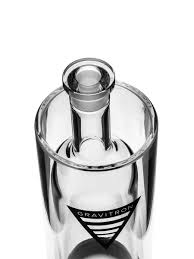
Crystal clear: A clean mouthpiece ensures unrestricted airflow.
If you have scrubbed, soaked, and rinsed, but your setup still reeks:
Plastic: It’s time to toss it. Plastic absorbs odors into its pores. No amount of cleaning will fix a 6-month-old soda bottle.
Rubber Seals: Check the O-rings or rubber grommets. These often trap resin and smell. Soak them in soapy water or replace them.
The Downstem: Use a pipe cleaner. Sometimes a thick chunk of resin gets stuck inside the metal or glass tube and won’t come out with just shaking.
A clean gravity bong is the difference between a headache and a high. Whether you are carefully polishing a $600 glass unit or shaking rice inside a soda bottle, the goal is the same: safe, clean, flavorful smoke.
Make cleaning a part of your ritual. Your lungs will thank you, and your hits will be smoother than ever.
No account yet?
Create an Account
